So you want to take a piece of the mobile pie, the hottest tech thing around right now? Good decision.
Mobile is hot, indisputably, and probably will be for a few incoming years. There are hundreds of unfullfiled job positions, wherever you are located. Companies are looking for every levels of programmers — interns, juniors, mids, seniors, experts. This article is for beginners — I will try to help you land your first job as an iOS programmer.
“Why should I listen to you?”,
you will probably say. And it’s a good question — taking bad advices from people who doesn’t know anything isn’t a good idea.
I’m not a source of unquestionable truth, well, I’m not even a really experienced iOS developer — but I know enough about the market to help you.
I started as an indie, with a few low-income apps, but high enough to allow me to focus on them and don’t worry about food and paying bills, then I joined a software house company as a junior iOS developer, to finally back to my own apps in Ecler Studios and focus on them completely without worrying about tomorrow. If I want to, I can always go back and work for someone else (but it’s probably not for me — entrepreneurial spirit is still strong inside me).
OK, but less talk, more action — what you need to do to become an iOS developer?
1. Buy a Mac (and iPhone — if you don’t have one).

To develop for iOS you need a Mac.
OK, there are some workarounds for this (like hackintosh or Mac In Cloud), but let’s be serious here — as an iOS developer, Mac will be your main working tool. You don’t have to go for the newest, fastest and the most expensive one, but you definitely need some Mac. If you want a very good entry device, consider Mac Mini — it probably presents the best value for the money you will pay for it. And if you are like me and mobility is your number one priority, get Air — preferably this one with a bigger screen. And you aren’t obligated to buy new stuff, second hand from eBay is just fine.
2. Install Xcode.
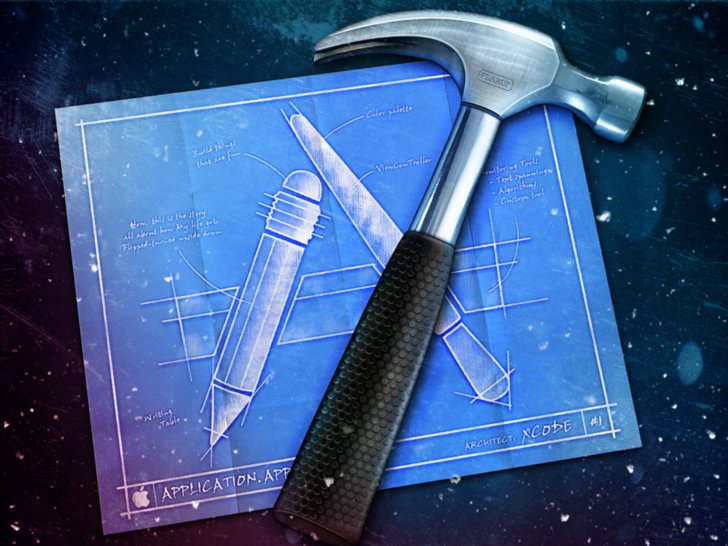
Now, when you have your shiny new (cleaned used is very close to the new too) Mac on your desk, it’s time to install the most important software for iOS developer — Xcode. Xcode is your IDE (integrated development environment) for making iOS apps. It’s free and you can download it straight from the Mac App Store, which you should do right now.
In Xcode you do code writing and editing, debugging, “drawing” your app in storyboards, unit test your app and many, many other things. You also use Xcode to upload your app to the App Store. Get familiar with it, it’s the most important software for every iOS developer.
3. Learn basics of programming (probably the hardest point).

Now one of the hardest steps — you need to jump straight into code. If you have some programming background, picking up Objective-C (harder to learn) or Swift (easier to learn) wouldn’t be hard — they are mostly standard, object oriented programming languages. But if you haven’t written a single line of code in your life, don’t worry — there are two great resources for true beginners:
- Ry’s Objective-C tutorial — for “oldschool” Objective-C fans. You don’t have to truly master Objective-C (Swift is the future <maybe even present>), but it’s good to know the basics and to be able to read the code written in this language.
- Swift language guide by Apple — this is the Swift language reference you want to use and learn from. Official Apple documentation, great as always.
Of course you don’t have to understand everything in depth — this will come later with experience. But you need to fully immerse yourself into all this variables, pointers, classes, data types and loops. It will give you context for a further learning.
4. Create a few different apps from step-by-step tutorials.

This is the point when you are finally starting to make something useful. Check these sites:
- AppCoda — probably the best starting point for beginners. You will find there many different tutorials, step by step with a lot of description. Definitely go trough all of them!
- Ray Wenderlich — another useful site with a giant database of iOS development tutorials. Learn from it, step by step.
But don’t stop only on these sites and tutorials! Move along and create a calculator app. Then create a weather app. Then a currency converter app. Music app. You got the point? Create whatever you find tutorial for. Make apps from tutorials until you’ll be fully comfortable in Xcode and language of your choice (Objective-C or Swift). And when this happens, move on to…
5. Start working on your own, custom app.

OK, things are getting serious. At this point, you are starting to make your own, custom app that you will show to your future employer on the interview.
But don’t be scary! You don’t have to create a second Facebook. You are starting for a junior poisition, right? A position, where you are supposed to learn from another employees as much as you can, not to be an expert with 5 years of experience.
So stay calm and think about what areas of iOS developing you are currently best on.
Maybe you have created an app, that uses networking a lot? Maybe you have studied UIKit the most and you are comfortable with creating complex user interfaces? Or maybe you created a music player and audio on iOS is your favorite part of developing? Leverage that interest and knowledge and build your app upon that. Focus on clean, stylyish and working code.
6. In the meantime, learn as much as you can about software development generally.
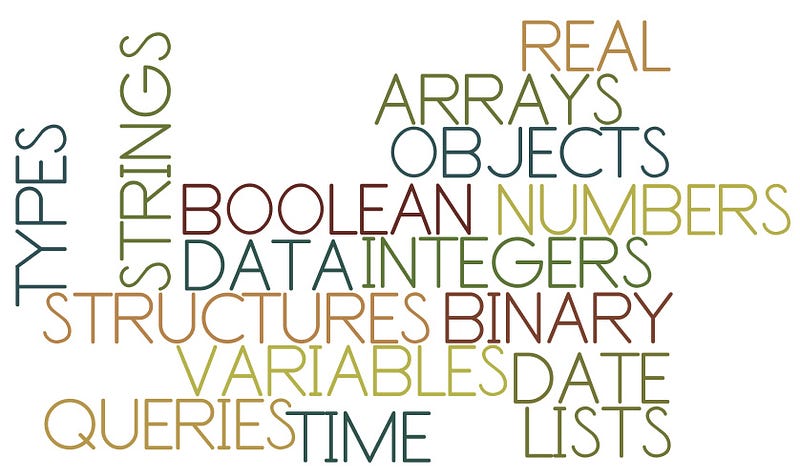
If you are reading this, you probably don’t want to go to the university for a few years to study computer science. The good news is you don’t have to!
A lot of computer science/programming/software engineering topics you can learn at your home, online.
Of course it won’t replace you getting a degree, but to get a job as an iOS developer you don’t have to have it. See the picture above? Learn about these things written on it. And I won’t give you links now— searching for informations is one of the most important developer’s skills. Start train it now. Google is your friend.
7. Finish your app.
After a few days, weeks or months of learning and working on your app, you should have a working app. This app is your resume — you should put into it your best work. A lot of it. Here’s a list of suggestions of what employers will be looking for in your app:
- working app
- clean code
- code organizing — small classes, well selected names for variables, nice file grouping inside the Xcode project etc.
- usage of storyboards (you have a big plus if you can mix both storyboard and code to create user interface)
- usage of CocoaPods
- some simple unit tests
- usage of external libraries (for examle some open source projects from GitHub — it’s a big plus if you can do this, because in real-life work you do this all the time)
Of course everything depends on company and job you are starting for, but generally with these skills above in your belt you can probably start for every junior iOS developer position.
OK, you have your beautiful, shiny app. The next step is…
8. Publish your app to the App Store.

OK, just to be clear — this step can be optional, because to do this, you need a an iOS developer account, which costs $99 yearly and there is a big chance that your app won’t break even that cost.
It’s up to you that you want to or not to have an app in the App Store, but a lot companies evaluate this as a big plus in your resume.
Having an app in the App Store means that you know how the publishing process works, what are the Apple’s restrictions (and there are a lot of them!) about apps, what you need to publish instead of the app itself (description, keywords, screenshots, promo video) etc.
You don’t have to do this, but I strongly recommend it (my apps in the App Store probably landed me my first job).
9. Upload your app to GitHub.
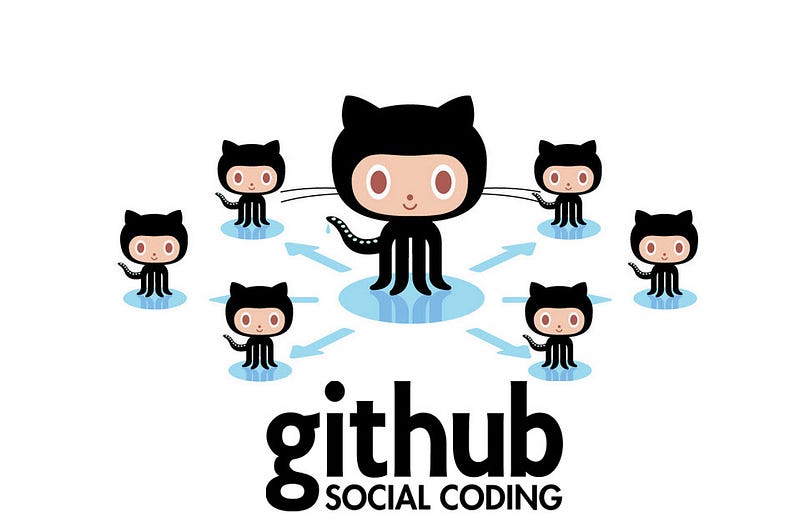
GitHub is a social platform generally used for code sharing (similar, but less popular alternative to GitHub is Bitbucket).
You can upload your app’s code here (and make it public or private), you can watch other people’s code, you can also contribute to open source projects. It’s widely used and you can benefit from GitHub even if you are a solo-only developer — by better organizing your code and having the best possible backup.
But why should you upload your app here? Well, to show your code to your future employer!
Don’t send your code by email, we are not in 90’s anymore.
10. Contact the company you want to work in!

And this is it — now you are prepared to get your first job as an iOS developer! Intern or junior probably, but it’s not important — the important thing is now you have the skills to get first job, and when you achieve this, the rest will take care of itself.
So prepare your resume, find that awesome company you want to work in and go create apps with them!
Source: Medium.